Pink Oysters mushrooms are one of the easiest species to grow.
They are fast to colonize, produce a ton of fruits and aren’t at all afraid of less than perfect conditions.
I just recently finished a fun backyard grow, and wanted to share how easy it is to produce a fresh bounty of one of nature’s prettiest fungi.
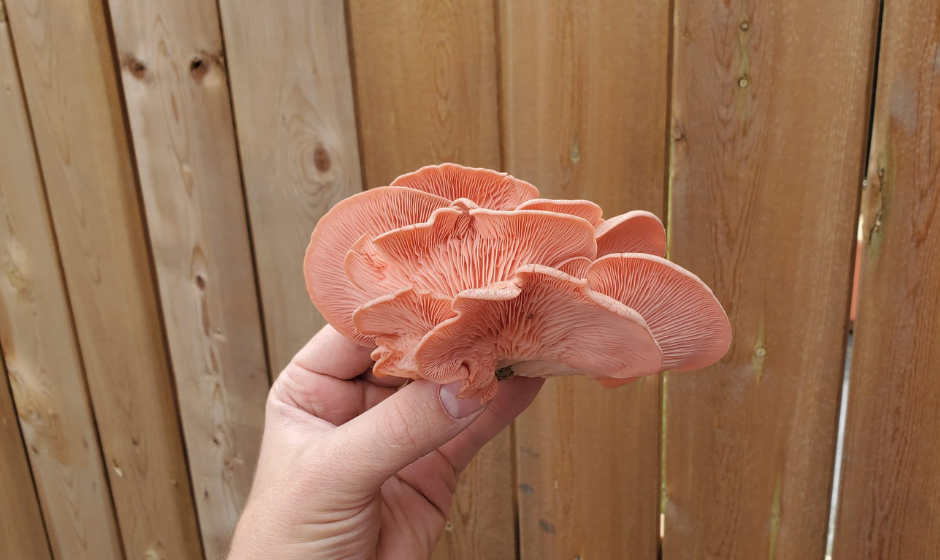
Pink Oysters are stunningly beautiful, producing huge bouquets of overlapping fruits that are truly (almost shockingly) pink.
One unique feature, when compared to other types of Oysters, is that they are heat tolerant.
They can easily be grown mid-summer, and are the oyster mushroom of choice for cultivators in tropical climates.
Further, they don’t require nearly as much fresh air as Blue Oysters- which is one of the most challenging aspects of growing anything in the Pleurotus genus.
There are a number of different species of Pink Oyster (like Pleurotus salmon or Pleurotus djamor) but they all share similar characteristics.

Pink Oysters grow on a variety of substrates, including straw, hardwood, mulch, coffee grounds, soy hulls, and a whole host of other organic materials.
Put simply- they are not at all picky eaters.
For this grow, I chose to keep it simple and use the FreshCap fruiting block recipe. This easy recipe of hardwood sawdust and bran never fails, although I would have likely had a better harvest if I had used the Master’s Mix.
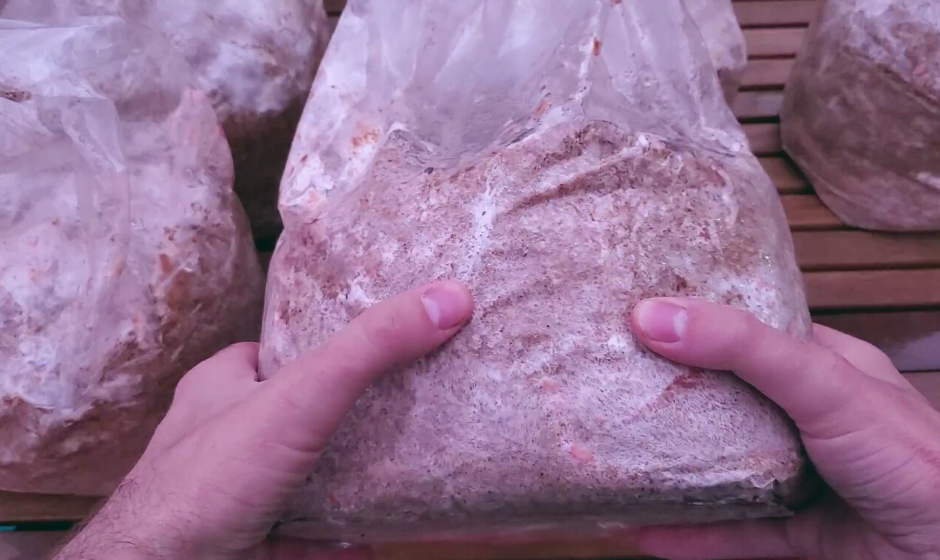
Each bag of substrate was sterilized for 2.5 hours at 15 PSI, and then inoculated in front of a flow hood with about ½ quart of Pink Oyster grain spawn.
After inoculation, the bags were placed on a dark shelf at room temperature, and left to do their thing.
Pink Oyster mycelium is really fast, and the mushrooms were already starting to pin inside the bag within 2 weeks.

As mentioned above, Pink Oysters aren’t all that picky. Still, you’ll have best results if you can keep them humid and reasonably warm, especially when trying to get them to pin.
To initiate fruiting, I opened the bags, folded over the tops, and cut a sliced directly across the front of the bag. This mimics the way that Oyster mushrooms grow in nature, with the plastic bag acting like the bark on a tree, and the slit acting like a crack in the bark that the mushrooms would eventually grow through.
You can also just choose to cut little slits where the mushrooms are already starting to pin. It’s not as pretty, but it works really well and is in fact what I ended up doing for this project after getting impatient waiting for the mushrooms to fruit exactly where I wanted them to.
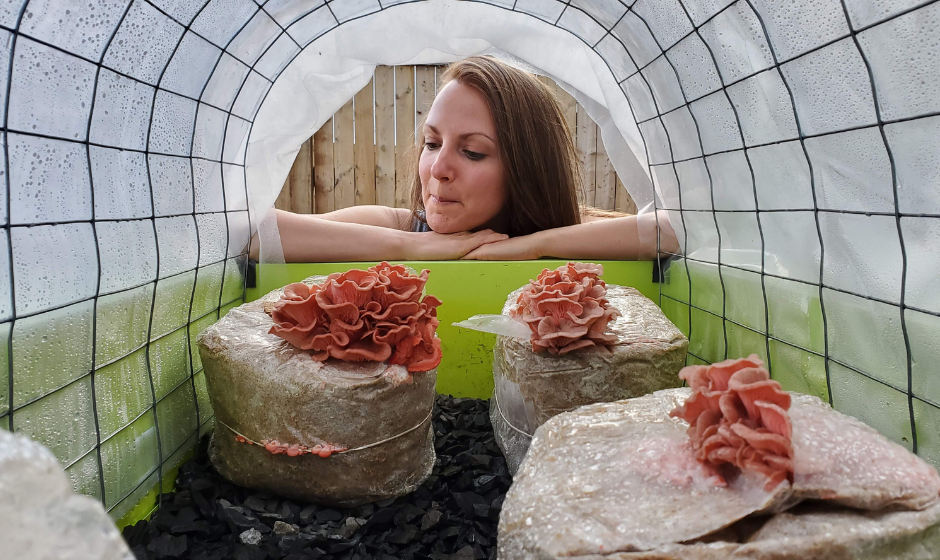
I decided to fruit these blocks outside in a “mini-greenhouse”.
This is a simple raised garden bed that has been fit with thick gauge chicken wire, some poly sheeting and draped with shade cloth. It was easy to build and does a great job of retaining humidity.
Although this works great for Pink Oysters, it probably wouldn’t work all that great for other types of oysters because:
Once the blocks were placed inside the greenhouse, the only thing I needed to do was ensure they didn’t dry out.
This was accomplished by simply spraying down the inside of the greenhouse with a hose once or twice a day.

After about 12 days in the greenhouse, the mushrooms were ready for harvest.
This was simply done by cutting the fruits off with a knife, trying to get as close to the surface of the block as possible.
Pink Oysters are prolific fruiters, and can easily obtain a second or third harvest if treated right. All you need to do to get subsequent flushes is to put the blocks right back into fruiting conditions.

Pink Oysters might be number one in terms of beauty and ease of cultivation, but they are one of the worst in terms of shelf life.
After even a couple of days in the fridge, they will start to smell “urinaceous”, which is one of the reasons why you aren’t all that likely to find this one at the grocery store.
They really are best if enjoyed right after harvest.
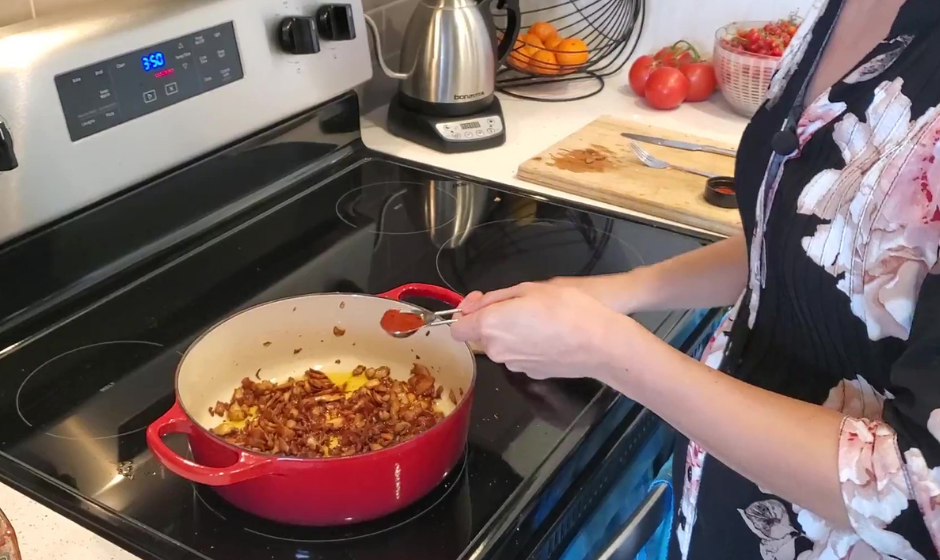
You can cook ‘em up the same as you would any other oyster, but one of our favorite ways to enjoy pinks is to make “Pink Oyster Mushroom Bacon”.
There is something about Pink Oysters (along with salt and spices) that makes them taste just like bacon.
Here’s the basic process:
Note: It is important to not add the smoked paprika until the mushrooms are basically cooked. If you add it too early, it will impart a bitter taste to the mushrooms.
These “bacon bits” can easily be added to salads, sandwiches, or even just enjoyed on their own. Trust me- it really does taste like bacon!
Hi' I'm Tony. I've dedicated a ton of time to learn all about the amazing world of mushrooms- and would love to share that information with you! I am particularily passionate about growing mushrooms, and teaching others how to do the same.